Winter Camping Basics
When the first subfreezing night temperatures hit and the
first real snowflakes start falling, some outdoorspeople hang up their packs
and camping gear for the year and settle in for a winter of trip-planning
for the following summer, maybe with some skiing or snowshoeing thrown in as
daytrip adventures. But as many of our Mountain House readers know from
experience, winter camping can be amazing: quiet and solitude abound, the
snow-draped scenery can be transcendent, and you can justify an extra cup or
two of hot cocoa around the campfire.
Newbies often find the idea of winter camping
intimidating, but with the proper planning and packing, and a couple easy,
close-to-home practice rounds or a guided introductory outing, the pursuit
is liable to become a favorite one—and a highlight of the whole
outdoor-recreation year.
Choosing Your Winter Tent
Select four-season tents for cold weather and snow
camping. Three-season tents may be fine in mild winter climates, but if
you’ll be contending with chilly temperatures, decent amounts of the white
stuff, and the threat of storms, the more robust protection and durability
of a four-season model make a huge difference. Characteristics of a typical
winter tent include solid fabric, strong aluminum or carbon-fiber poles, a
wraparound ground-hugging fly and ample vestibules, and a wind- and
snow-resistant dome shape.
You’ll usually be paying more for a four-season tent and
hauling more weight, but c’mon: You don’t want to be skimping on shelter
when it comes to snow camping.
Snow Shelters
It’s a very sensible idea to learn how to make a variety
of snow shelters if you’re interested in winter camping. These constructions
can make tenting out in winter generally more comfortable; they can also
save your life if Old Man Winter throws a multiday blizzard your way.
Building a snow wall around your tent shields it from
biting wind and snow. And in the face of a bad storm, a snow trench, snow
cave, igloo, or quinzhee can serve as a warmer, drier, and more resilient
refuge than a tent—and one surprisingly quick to create, if you know what
you’re doing, and if you’ve got a snow shovel (and perhaps a snow saw as
well) on hand.
Other Winter Camping Sleeping Gear
Your winter sleeping bag should be rated for temperatures
at least 10 degrees colder than the coldest you expect. A down bag offers
the most warmth, while synthetic fill is better-insulating when soaked. A
sleeping bag liner adds significant extra warmth.
A good snow-camping practice is to sleep atop two layers
of sleeping pad: a self-inflating one just beneath you, a foam one below
that—an efficient double-whammy of insulation.
Consider packing a bivy sack for emergency shelter; a
bivy also ups the comfort level inside a snow cave or trench.
General Cold Weather Camping Gear
Besides your shelter and sleeping equipment, you’ll of
course want to pack the Ten Essentials. Fire-starting materials in a
waterproof sack can make the difference between life and death in a serious
snowstorm. A compass can become your entire world in a whiteout. Summer
weather often forgives an underprepared backpacker; winter tends to be less
generous.
Clothing-wise you’ll have your base, middle, and shell
layers, coupled with a wool hat and/or balaclava, gloves and mittens (the
latter warmer, the former useful for around-camp tasks), and synthetic or
merino-wool socks (a thin one beside your skin, a thicker one outside). Your
boots should be winter/mountaineering-style, unless you’re skiing of course.
Useful year-round, gaiters are lifesavers in wintertime:
They keep out snow and water and buffer your shins from sharp crusts and
buried logs and other obstacles.
In snowy conditions, you’ll likely want some mobility
aids. Snowshoes are the most versatile for winter backpackers; cross-country
or randonnée skis make covering a lot of drifted-over ground a joy. The
crampons that mountain climbers rely on can also serve a winter backpacker
negotiating steep terrain well, as can an ice axe. You’ll definitely want
ski/trekking poles with baskets.
Given the additional and heavier gear snow camping
demands, the winter backpack needs to be bigger than your average summer
one. You’re likely looking at a 70 to 80L bag, especially for multiple days
out in the wintry wonderland.
A sled can help the snowshoer or skier tote extra
equipment and supplies, though obviously some landscapes are more
sled-friendly than others.
A super-helpful but often overlooked winter-camping
equipment? The good old whisk broom, useful for brushing off tents, boots,
and other gear.
Food & Water
Winter camping food stores must take into account the
greater energy expenditures of backcountry travel in the cold season: You
may well be requiring something like 5,000 or 6,000 calories a day depending
on the nature of your trek and the conditions. It’s all about taking
advantage of the differing fuel properties of carbs, proteins, and fats. The
latter provide great evening calories given their slow-burn digestive
release, which’ll keep you warmer overnight.
Mountain House Meals make
stellar breakfast, dinner,
and emergency fare on winter-camping adventures. That’s not only because
they’re lightweight, packable, and chockfull of balanced nutrition. It’s
also because of their just-add-hot-water preparation, which means you
conserve fuel and minimize cooking time: no small consideration when the
wintry elements aren’t at their friendliest. The same goes for cleanup,
which can be a real drag in the post-dinner cold and dark, and which is
next-to-nothing with Mountain House pouches.
(Lunch, incidentally, is often worth substituting with
steady snacking on a winter trek: Stopping to prepare a midday feast takes
up precious daylight and cools you down quickly.)
Drink plenty of water: Dry winter air and the extra
exertion of moving over snow dehydrates you quickly. Protect your water
bottles and hydration tubes from freezing.
Melting snow to obtain water isn’t an efficient use of
stove fuel, but it’s certainly an option. Just remember to add a small
amount of water to the snow in your pot before heating; otherwise, the pot
can scorch. You can also melt snow by packing it into a water bottle or
leaving potfuls of snow in the sun at the campsite. Pathogen-wise, you’re
probably OK drinking meltwater from freshly fallen snow, but the snowpack
can easily be contaminated by animal droppings and urine. Whether you want
to boil or otherwise purify melted snow is your call.
Liquid fuel is better than compressed-gas canisters for
winter camping because it performs better at low temperatures, white gas in
particular. Remember: If you're going to rely on melted snow for your water,
you'll need to bring along additional fuel.
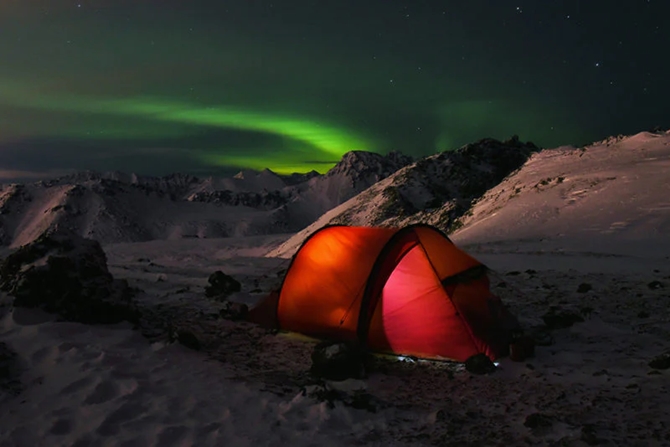
Setting Up Winter Camp
Wisely selecting a campsite for snow camping ups the
likelihood of a cozy night toasting the brilliant winter stars and enjoying
a deep, warm, well-earned snooze—as opposed to enduring a miserable
nocturnal marathon of sleepless shivering, regular trips outside to clear
off the accumulating snow that threatens to collapse your tent, and
generally trying to will that slow-to-rise winter run into coming up.
As we’ve already mentioned, a snow wall helps protect an
otherwise exposed tent from wind; you can also take advantage of natural
windbreaks such as groves and large drifts. Hard-packed, sculpted snow
suggests a wind-scoured site, whereas heavy, soft drifts imply a leeward
zone of accumulation. Camping in heavy woods can shelter you from wind, but
your tent may also be doused by snow-shedding boughs following
precipitation.
You must know the basics
of avalanche safety if you're roaming the winter backcountry: That applies
for your daily travel and also for finding a good spot to camp. (Bone up on
snow slides—from the weather, terrain, and snowpack conditions that make
them more likely to best practices for surviving them—at the National
Avalanche Center website and through
the training centers it recommends.)
Tamp down your campsite, leaving extra room around the
tent to allow for brushing off snow. Creating a flat bed for your tent helps
you avoid (or at least minimize) the discomfort of rock-hard lumps under
your sleeping pad once the snow consolidates into an icy cast within the
tent footprint.
A shallow pit at the tent entrance and under the
vestibule makes a convenient place to wrangle footgear and cook in inclement
weather.
More Winter Camping Resources
For more information on successful winter camping, check out our Mountain
House checklist from earlier this year as
well as these informative writeups from REI, Princeton
University's Outdoor Action program and TakeOutdoors.
Thanks to
Mountain
House Blogs for the above information.